Setting the Python Anaconda Environment in VS Code
Visual Studio Code is an excellent IDE for working with all kinds of different languages and projects. Additionally, I am quite surprised by how many open source developers (i.e. Microsoft “detractors”) out there have taken on VS Code as their day-to-day IDE. For my work, it performs equally well when using Python for Data Science projects as it does for any other development I am doing – I can easily switch between Python, JavaScript, C#, etc. without having to change IDEs.
For package management in Python I am a huge supporter of Anaconda, and unfortunately, setting your Anaconda environment to be used in VS Code isn’t exactly intuitive. Also, up until now, from the command line (on a Mac) I have been able to execute “source active name-of-environment” then execute “code” to open VS Code and it would automatically use that Anaconda environment, but as of today this is no longer working.
Follow these two steps to get VS Code set up properly to use your Anaconda environment:
First, (on a Mac) in the VS Code window hit Command-Shift-P and start to type in “Python: Select Interpreter” and select it.

Python: Select Interpreter
Next, find and select your desired environment in the list shown and it will be set in the “Workplace Settings” configuration section (settings.json configuration file).

Select Environment
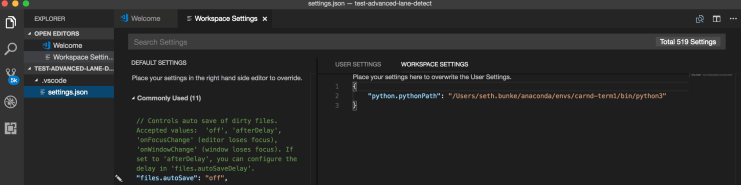
VS Code Workplace Settings
From here just F5 to debug, or execute your script from the terminal command line and your code will run in the Anaconda environment you selected every time you open this project.


